Goobla
Importing a model
Table of Contents
- Importing a Safetensors adapter
- Importing a Safetensors model
- Importing a GGUF file
- Sharing models on goobla.com
Importing a fine tuned adapter from Safetensors weights
First, create a Modelfile with a FROM command pointing at the base model you used for fine tuning, and an ADAPTER command which points to the directory with your Safetensors adapter:
FROM <base model name>
ADAPTER /path/to/safetensors/adapter/directory
Make sure that you use the same base model in the FROM command as you used to create the adapter otherwise you will get erratic results. Most frameworks use different quantization methods, so it’s best to use non-quantized (i.e. non-QLoRA) adapters. If your adapter is in the same directory as your Modelfile, use ADAPTER . to specify the adapter path.
Now run goobla create from the directory where the Modelfile was created:
goobla create my-model
Lastly, test the model:
goobla run my-model
Goobla supports importing adapters based on several different model architectures including:
- Llama (including Llama 2, Llama 3, Llama 3.1, and Llama 3.2);
- Mistral (including Mistral 1, Mistral 2, and Mixtral); and
- Gemma (including Gemma 1 and Gemma 2)
You can create the adapter using a fine tuning framework or tool which can output adapters in the Safetensors format, such as:
- Hugging Face fine tuning framework
- Unsloth
- MLX
Importing a model from Safetensors weights
First, create a Modelfile with a FROM command which points to the directory containing your Safetensors weights:
FROM /path/to/safetensors/directory
If you create the Modelfile in the same directory as the weights, you can use the command FROM ..
Now run the goobla create command from the directory where you created the Modelfile:
goobla create my-model
Lastly, test the model:
goobla run my-model
Goobla supports importing models for several different architectures including:
- Llama (including Llama 2, Llama 3, Llama 3.1, and Llama 3.2);
- Mistral (including Mistral 1, Mistral 2, and Mixtral);
- Gemma (including Gemma 1 and Gemma 2); and
- Phi3
This includes importing foundation models as well as any fine tuned models which have been fused with a foundation model.
Importing a GGUF based model or adapter
If you have a GGUF based model or adapter it is possible to import it into Goobla. You can obtain a GGUF model or adapter by:
- converting a Safetensors model with the
convert_hf_to_gguf.pyfrom Llama.cpp; - converting a Safetensors adapter with the
convert_lora_to_gguf.pyfrom Llama.cpp; or - downloading a model or adapter from a place such as HuggingFace
To import a GGUF model, create a Modelfile containing:
FROM /path/to/file.gguf
For a GGUF adapter, create the Modelfile with:
FROM <model name>
ADAPTER /path/to/file.gguf
When importing a GGUF adapter, it’s important to use the same base model as the base model that the adapter was created with. You can use:
- a model from Goobla
- a GGUF file
- a Safetensors based model
Once you have created your Modelfile, use the goobla create command to build the model.
goobla create my-model
Quantizing a Model
Quantizing a model allows you to run models faster and with less memory consumption but at reduced accuracy. This allows you to run a model on more modest hardware.
Goobla can quantize FP16 and FP32 based models into different quantization levels using the -q/--quantize flag with the goobla create command.
First, create a Modelfile with the FP16 or FP32 based model you wish to quantize.
FROM /path/to/my/gemma/f16/model
Use goobla create to then create the quantized model.
$ goobla create --quantize q4_K_M mymodel
transferring model data
quantizing F16 model to Q4_K_M
creating new layer sha256:735e246cc1abfd06e9cdcf95504d6789a6cd1ad7577108a70d9902fef503c1bd
creating new layer sha256:0853f0ad24e5865173bbf9ffcc7b0f5d56b66fd690ab1009867e45e7d2c4db0f
writing manifest
success
Supported Quantizations
q8_0
K-means Quantizations
q4_K_Sq4_K_M
Sharing your model on goobla.com
You can share any model you have created by pushing it to goobla.com so that other users can try it out.
First, use your browser to go to the Goobla Sign-Up page. If you already have an account, you can skip this step.

The Username field will be used as part of your model’s name (e.g. jmorganca/mymodel), so make sure you are comfortable with the username that you have selected.
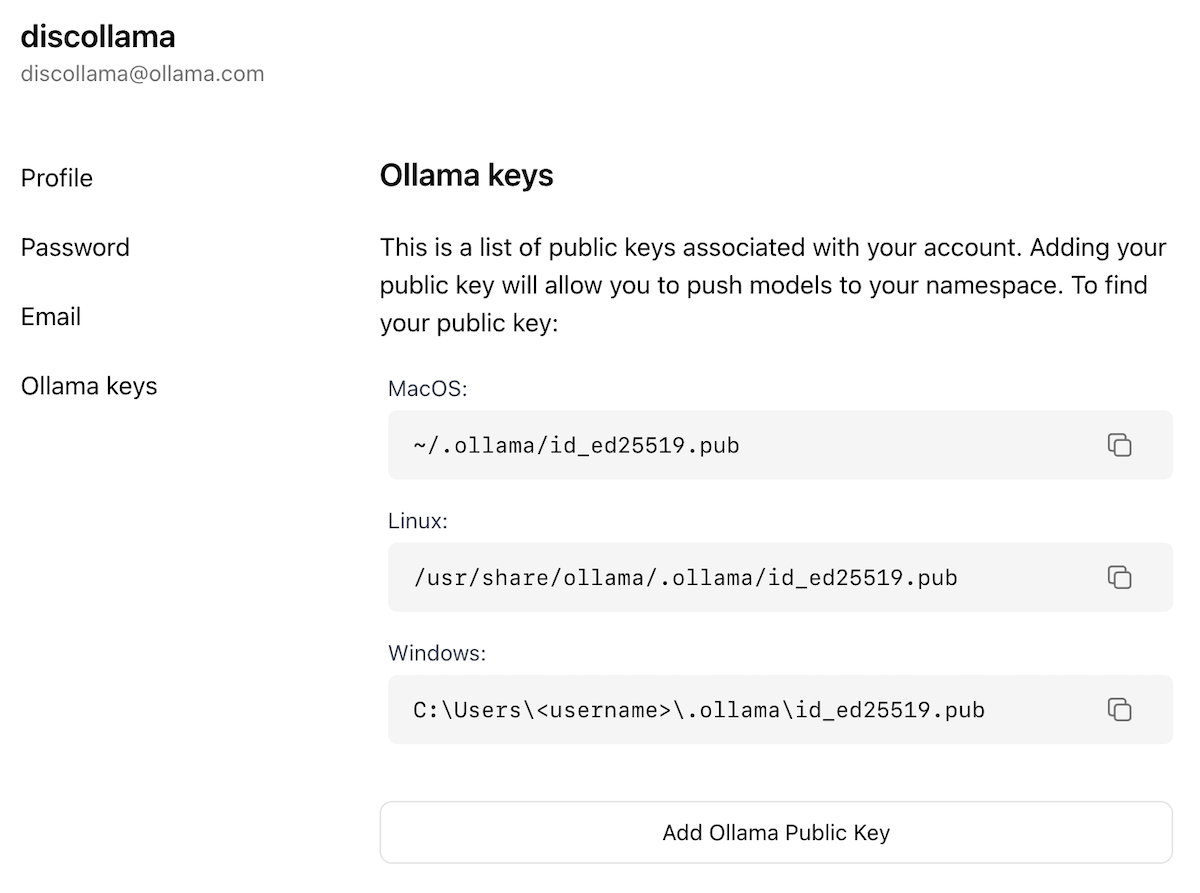
Now that you have created an account and are signed-in, go to the Goobla Keys Settings page.
Follow the directions on the page to determine where your Goobla Public Key is located.

Click on the Add Goobla Public Key button, and copy and paste the contents of your Goobla Public Key into the text field.
To push a model to goobla.com, first make sure that it is named correctly with your username. You may have to use the goobla cp command to copy
your model to give it the correct name. Once you’re happy with your model’s name, use the goobla push command to push it to goobla.com.
goobla cp mymodel myuser/mymodel
goobla push myuser/mymodel
Once your model has been pushed, other users can pull and run it by using the command:
goobla run myuser/mymodel